





Written by: Aaron Rovner, Founder, Saas Hero | Last updated: June 17, 2026
Key Takeaways for B2B SaaS Agencies
- B2B SaaS agencies lose an average 36.1% of paid ad spend to low-intent clicks that never reach pipeline, especially under percentage-of-spend billing models.
- A 7-step waste-reduction framework executed in 30 days ties every ad dollar directly to Net New ARR instead of vanity metrics like leads or MQLs.
- Negative keyword hygiene, competitor conquest campaigns, and message-matched landing pages recover wasted spend quickly while improving Quality Score and conversion rates.
- CRM revenue attribution via GCLID pipelines, audience exclusions, and payback-tied bidding guardrails ensure budget decisions focus on closed-won deals over form fills.
- Book a discovery call with SaaSHero to implement this flat-fee accountable system and remove paid ad waste from your B2B SaaS accounts.
Core Access and Definitions Before You Start
Required access before starting: Google Ads admin access, LinkedIn Campaign Manager admin access, CRM admin access (HubSpot or Salesforce), Google Analytics 4 property, and Google Tag Manager container.
Net New ARR: Annual Recurring Revenue from new customers only, excluding expansion or renewal. Treat this as the North Star metric, not leads or MQLs.
Payback Period: Months required to recover Customer Acquisition Cost from gross margin. An 80-day payback period, as SaaSHero achieved for TestGorilla, signals a scalable, investor-ready growth engine.
SQL (Sales Qualified Lead): A lead that sales has accepted as meeting ICP criteria and entered into an active opportunity stage in the CRM.
Multi-touch Attribution: A model that distributes revenue credit across all ad interactions in a buyer’s journey, not just the last click. Without CRM integration, attribution stops at the lead stage and cannot connect ad spend to closed-won deals, which makes budget decisions structurally unreliable.
The Complete 7-Step Waste-Reduction Framework
- Negative Keyword Hygiene for Competitor and Navigational Intent
- Competitor Conquest Campaign Architecture
- Ad-to-Landing-Page Message Match and CRO Audits
- CRM Revenue Attribution Setup (GCLID-to-CRM Pipelines)
- Frequency Capping, Audience Exclusions, and Remarketing Hygiene
- Automated Bidding Guardrails Tied to Payback Period
- Weekly Audit Cadence and Net New ARR Reporting
Step 1: Clean Up Negative Keywords for Navigational and Competitor Waste
Purpose: Eliminate spend on searches where the user has no intent to evaluate a new solution.
Actions: Pull the Search Terms report for the trailing 90 days to spot wasted spend patterns. Within this report, flag all queries containing only a competitor brand name with no modifier (for example, “Salesforce” alone). These represent navigational searches from existing customers of that competitor, not evaluation intent. Add these as exact-match negatives at the campaign level to stop that spend. Then build a shared negative keyword list covering three waste categories: job-seeker terms (“careers,” “jobs,” “salary”), support terms (“login,” “help,” “forgot password”), and student or research terms (“what is,” “definition,” “essay”).
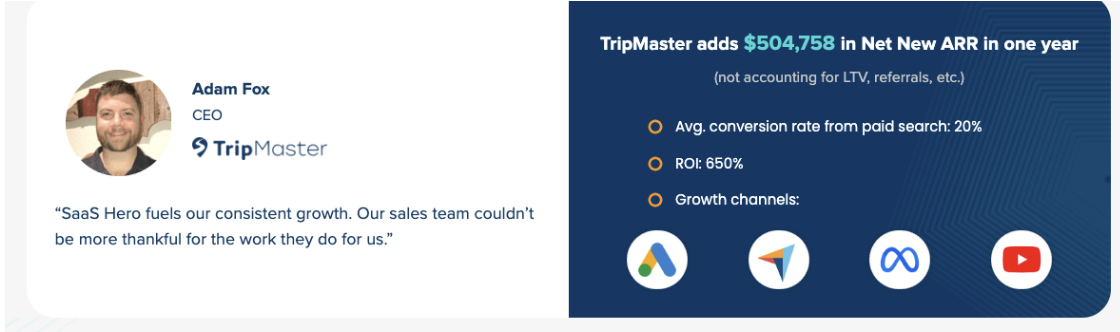
B2B SaaS example: An HR Tech client bidding on competitor terms burned budget on “[Competitor] login” queries, which showed pure navigational intent from existing customers. Adding the modifier filter recovered 18% of monthly spend within two weeks. A transit software client (category: TripMaster vertical) removed “free transit pass” and “student bus routes” queries that inflated click volume with zero pipeline contribution.
Tip: Negating a bare competitor brand name does not block modifier queries like “[Competitor] alternatives.” Confirm modifier campaigns remain active after adding navigational negatives.
Common Mistake: Adding negatives only at the ad group level. Apply shared lists at the account level to prevent the same waste from reappearing in new campaigns.
Validation checkpoint: Search Terms report shows zero impressions for navigational competitor terms after 7 days.
Step 2: Build Competitor Conquest Campaigns Around Evaluation Intent
Purpose: Capture high-intent buyers actively evaluating competitors while avoiding low-intent brand lookups.
Actions: Target competitor brand names combined with modifiers such as “reviews,” “pricing,” “alternatives,” and “vs” using exact-match and tight phrase-match structures. Create a dedicated comparison landing page for each top competitor. Include a feature matrix, G2 badge data, and a switching resource such as free migration or a data import tool. Add qualifiers in ad copy such as “Built for Enterprise, Not Small Business” to discourage unqualified clicks in long sales-cycle environments. Apply RLSA bid adjustments of plus 50% for users who previously visited the client’s pricing page and now search competitor terms.
Tip: Use competitor names only in factual comparisons. Avoid competitor logos because of copyright risk and ensure ad headlines clearly identify your client as the advertiser.
Common Mistake: Sending conquest traffic to the homepage. Message mismatch between a “[Competitor] pricing” query and a generic homepage hurts Quality Score and conversion rate at the same time.
Validation checkpoint: Conquest campaigns show Quality Score of at least 6 and landing page conversion rate of at least 5% within 14 days of launch.
Step 3: Align Ad Messaging With Landing Pages and Run CRO Heuristic Audits
Purpose: Send every click to a page that immediately confirms relevance, which reduces bounce and wasted spend on unconverted traffic.
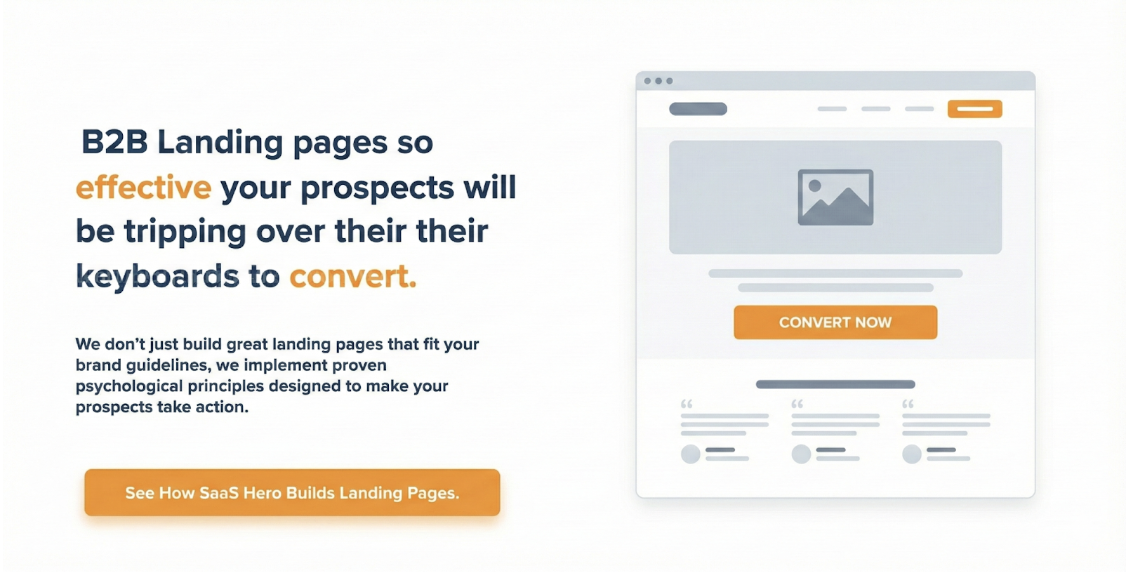
Actions: Run a heuristic audit with three evaluators who review each landing page against five principles. Check Relevance (the page matches the ad), Clarity (the value proposition is clear in 5 seconds), Trust (logos and testimonials appear above the fold), Friction (form fields stay minimal), and Hierarchy (the layout guides visitors toward the CTA). Map every active ad group to its destination URL. Flag any group where the headline keyword does not appear in the landing page H1 or hero copy.
Tip: Dynamic Keyword Insertion in ad headlines requires a matching dynamic element on the landing page. Without that, message match breaks at the click.
Common Mistake: Running CRO tests before fixing obvious heuristic failures. A broken trust signal or missing CTA above the fold will suppress results from any A/B test.
Validation checkpoint: Bounce rate on paid landing pages drops by at least 15% within 30 days of implementing heuristic fixes.
Step 4: Connect GCLIDs to CRM Revenue for True Attribution
Purpose: Connect every ad click to closed-won revenue so budget decisions rely on ARR, not form fills.
Actions: Enable auto-tagging in Google Ads to capture GCLIDs. Pass the GCLID as a hidden field on every landing page form. Map the GCLID field to a custom property in HubSpot or Salesforce. Configure Offline Conversion Tracking to import CRM deal stages such as MQL Qualified, Demo Held, SQL, and Closed Won back into Google Ads. Implement server-side Conversion APIs (Google Enhanced Conversions, LinkedIn CAPI) to capture events that client-side pixels miss because of ad blockers and cookie deprecation. Set attribution windows to at least 90 days to reflect B2B sales cycles.
Teams implementing multi-touch attribution report 14–36% cost-per-acquisition improvements and an average 19% ROI lift in the first year. The GCLID pipeline makes these gains directly measurable.
Tip: CRM duplicate contact rates above 10% fragment attribution across duplicate records, which breaks the GCLID-to-revenue linkage. Run a deduplication audit before activating Offline Conversion Tracking.
Common Mistake: Training Google Ads Smart Bidding on form submissions instead of importing downstream CRM stages. Smart Bidding will maximize form fills from unqualified traffic if that becomes the primary signal.
Validation checkpoint: At least 80% of Closed Won deals in the CRM have a traceable GCLID or UTM source within 45 days of setup.
Step 5: Use Frequency Caps and Exclusions to Protect Budget
Purpose: Stop paying to reach people who will never buy and avoid oversaturating people who already have.
Actions: In LinkedIn Campaign Manager, set frequency caps at four impressions per member per week for awareness campaigns. Exclude contacts already in active HubSpot or Salesforce opportunity stages from awareness campaigns so in-pipeline audience suppression can recover part of the spend. Exclude non-ICP contacts such as students, freelancers, and incorrect seniority levels before campaigns launch, which removes 20–35% of wasted LinkedIn spend. In Google Ads Display and YouTube, apply Customer Match lists of existing customers as exclusions.
Tip: Sync CRM exclusion lists weekly, not monthly. Contacts move into active pipeline stages continuously, and a monthly sync leaves weeks of wasted impressions on already-engaged prospects.
Common Mistake: Applying audience exclusions only to prospecting campaigns. Remarketing campaigns also waste budget on closed-lost deals from more than 18 months ago. Set a 180-day recency cap on all remarketing audiences.
Validation checkpoint: LinkedIn audience exclusion lists are active and CRM sync is verified weekly. Display and YouTube campaigns show existing customer impressions at zero.
Step 6: Set Bidding Guardrails Based on Payback Period
Purpose: Keep Smart Bidding from chasing volume at a cost that breaks unit economics.
Actions: Calculate the maximum allowable Cost Per SQL using this formula. Multiply the target payback period in months by monthly gross margin per customer, then divide by the average SQL-to-close rate. Enter this figure as the Target CPA in Google Ads Smart Bidding. Use portfolio bid strategies with hard Max CPC caps to prevent auction spikes from consuming budget. Review bid strategy performance weekly against the CRM-imported Closed Won conversion action, not the form-fill proxy.
Tip: Smart Bidding works reliably when it has at least 30 conversions in the trailing 30 days. If volume sits below this threshold, use Manual CPC with bid adjustments by device, time, and audience segment until data accumulates.
Common Mistake: Setting Target CPA based on Cost Per Lead rather than Cost Per SQL. A $50 CPL looks efficient until the CRM shows that only 2% of those leads ever reach a demo.
Validation checkpoint: Target CPA is documented, entered in the platform, and reconciled against CRM Cost Per SQL every month.
Step 7: Run Weekly Audits and Report on Net New ARR
Purpose: Replace monthly vanity-metric PDFs with a weekly revenue-tied review that catches waste before it compounds.
Actions: Every Monday, pull the Search Terms report and add new negatives. Review impression share lost to budget versus lost to rank. Budget loss signals overspend on low-intent terms. Rank loss signals underbidding on high-intent terms. Every Friday, pull the CRM pipeline report filtered by “Ad Source” and calculate week-over-week change in SQL volume and pipeline value by campaign. Build a Looker Studio dashboard that connects Google Ads, LinkedIn Ads, GA4, and HubSpot or Salesforce into a single Net New ARR view. Report to clients on Pipeline Value, Cost Per SQL, and Net New ARR, not impressions, CTR, or MQL volume.
Tip: Many B2B marketers rank connecting marketing activity to revenue as a top measurement challenge. A pre-built Looker Studio template that auto-pulls CRM deal data removes the manual reconciliation that pushes agencies toward vanity metrics.
Common Mistake: Reporting on platform-attributed conversions without reconciling against CRM Closed Won. As noted in Step 4, platform data alone is unreliable, so always validate against CRM closed-won records as the source of truth.
Validation checkpoint: Client receives a weekly Looker Studio report showing Net New ARR by campaign source with zero manual data entry required.
Measure and Validate Performance With Revenue Metrics
Evaluate performance across three layers. Use ad platform data for click volume, Quality Score, and impression share. Use GA4 for session quality, landing page engagement rate, and form completion rate. Use the CRM for SQL volume, pipeline value, and Closed Won ARR by source. Longer B2B sales cycles require attribution windows of 90 to 180 days and first-touch attribution that credits awareness campaigns which started journeys that closed months later. Counter last-click bias by importing all CRM deal stages into Google Ads Offline Conversion Tracking so Smart Bidding receives a complete revenue signal instead of a last-click proxy. Companies with robust attribution often see meaningful improvements in marketing ROI by shifting spend toward channels that drive closed revenue and away from channels that only drive cheap leads.
Advanced Scaling and Sales Team Integration
At budgets above $50,000 per month across multiple channels, layer LinkedIn Ads targeting by job title and company size against Google Search retargeting to create a coordinated multi-channel sequence. LinkedIn builds awareness with ICP decision-makers, while Google captures their later high-intent searches. Align with the sales team by sharing the weekly SQL report directly in Slack and tagging campaign sources on every CRM deal so sales can comment on lead quality by channel. Use this feedback loop to adjust audience targeting and bid strategy inputs every month. For clients with multiple product lines, build separate GCLID pipelines per product so revenue attribution does not blend across different ACVs and sales cycles.
Summary Checklist and Next Steps by Agency Maturity
Weeks 1–2 (Foundation): Complete Steps 1 through 3. Run the negative keyword audit, set up conquest campaign architecture, and complete the heuristic CRO review. These steps require no new tools and deliver immediate spend recovery.
Weeks 3–4 (Attribution): Complete Steps 4 and 5. Set up the GCLID-to-CRM pipeline and audience exclusion sync. These steps require CRM admin access and 1 to 2 days of technical setup.
Ongoing (Optimization): Run Steps 6 and 7 continuously. Set bidding guardrails once and review them monthly. Maintain the weekly audit cadence every week without exception.
For smaller retainers (sub-$10k/month ad spend): Prioritize Steps 1, 4, and 7. Negative keyword hygiene and basic GCLID tracking deliver the highest waste recovery per hour of setup time at lower budget scales.
For agencies managing 5+ SaaS clients: Templatize the Looker Studio dashboard and the negative keyword shared list structure so each new client account inherits the system from day one instead of being built from scratch.
Schedule a strategy session to get SaaSHero’s complete agency audit template and apply this 7-step system to your highest-spend client account this week.
Frequently Asked Questions
How long does it take to set up the full 7-step system for a new client?
Steps 1 through 3, which cover negative keyword hygiene, conquest campaign architecture, and the CRO audit, usually finish in 5 to 7 business days with Google Ads admin access and a working landing page. Step 4, the GCLID-to-CRM attribution pipeline, requires 1 to 2 days of technical setup when HubSpot or Salesforce already has a custom properties structure in place. The full system, including bidding guardrails and the weekly reporting dashboard, typically becomes operational within 14 to 21 days of account access. The one-time setup investment stays front-loaded, while ongoing maintenance runs on the weekly audit cadence described in Step 7.
What roles are required inside the agency to execute this playbook?
The system requires a paid media strategist with Google Ads and LinkedIn Campaign Manager experience, a CRM administrator with access to create custom properties and deal stage workflows in HubSpot or Salesforce, and a reporting analyst or team member comfortable building Looker Studio dashboards with blended data sources. SaaSHero’s senior-led model keeps the client-to-manager ratio at a maximum of 8 to 10 clients per strategist, which keeps the weekly audit cadence realistic without shortcuts. Agencies that rely on a single generalist managing more than 30 accounts usually see Steps 4 and 7 fail first because CRM reconciliation consumes the most time.
Can this framework be adapted for clients with smaller retainers or ad budgets below $10,000 per month?
Yes, with clear prioritization. At sub-$10,000 monthly ad spend, the highest-return steps are Step 1 for negative keyword hygiene, Step 4 for basic GCLID-to-CRM tracking, and Step 7 for weekly Net New ARR reporting. These three steps alone often recover 20 to 30 percent of wasted spend and create the revenue attribution foundation needed to justify budget increases. Steps 2 and 5, which cover competitor conquesting and audience exclusions, become more impactful as budget scales above $15,000 per month, where the absolute dollar recovery from exclusion lists and conquest architecture justifies the setup time. SaaSHero’s flat-fee entry point of $1,250 per month for accounts spending up to $10,000 keeps professional implementation of this system accessible at the earliest stage of a SaaS company’s paid media investment.
How often should the full audit be repeated after the initial 30-day setup?
The negative keyword review in Step 1 runs weekly as part of the Monday audit cadence. The heuristic CRO audit in Step 3 should repeat quarterly or whenever a new campaign type or landing page launches. The GCLID-to-CRM attribution mapping in Step 4 needs a monthly reconciliation check to catch CRM duplicate contacts, sync latency issues, and any new form pages deployed without the hidden GCLID field. Bidding guardrails in Step 6 are reviewed monthly against the updated Cost Per SQL figure from the CRM. The Looker Studio Net New ARR dashboard in Step 7 remains a live document reviewed every week, not a quarterly deliverable. The 30-day framing of this playbook refers to the initial implementation window, while the system itself runs continuously and compounds its waste-reduction impact over time.